
Intro
Tired of sharing your IP & sensitive data to OpenAI ? What if you could run your own private AI chatbot powered by Local Inference & LLMs, with 100% data privacy—all inside a Kubernetes cluster?
Today we’ll show you how to deploy an end-to-end LLM inference setup on a Civo Cloud Talos K8s cluster with terraform. From provisioning Ollama to serving models through a web UI, you’ll learn how to build and automate a secure, containerized AI experience without compromising sensitive data.
Welcome to the future of private AI at scale. 🚀
What’s in the box?📦
The deployment includes:
- ✅ Civo Kubernetes Cluster (Talos)
- ✅ Ollama LLM Server (helm)
- ✅ Open WebUI for chatbot interaction (helm)
- ✅ Traefik as the Ingress Controller
- ✅ Cert-Manager for TLS (Self-Signed Certificate)
- ✅ Okta Authentication for Secure Access (Optional)
- ✅ BONUS🔥: This deployment will run on CPU💚
Enjoy!😎
Prerequisites
Before you begin, ensure you have the following:
- 🛠 Terraform (
>=1.5) - 🛠 kubectl (
>=1.25) - 🛠 Helm (
>=3.10) - ☁ Civo Cloud Account with an API key
- Optional:
- 🔑 Okta Developer Account (if okta authentication is enabled)
Getting started
Civo defaults to lightweight k3s clusters, which work great for many use cases. But for this project, I wanted something closer to a production-grade, on-prem setup. So I went with Talos Linux: minimal, secure, and purpose-built for Kubernetes.
1️⃣Clone the repository
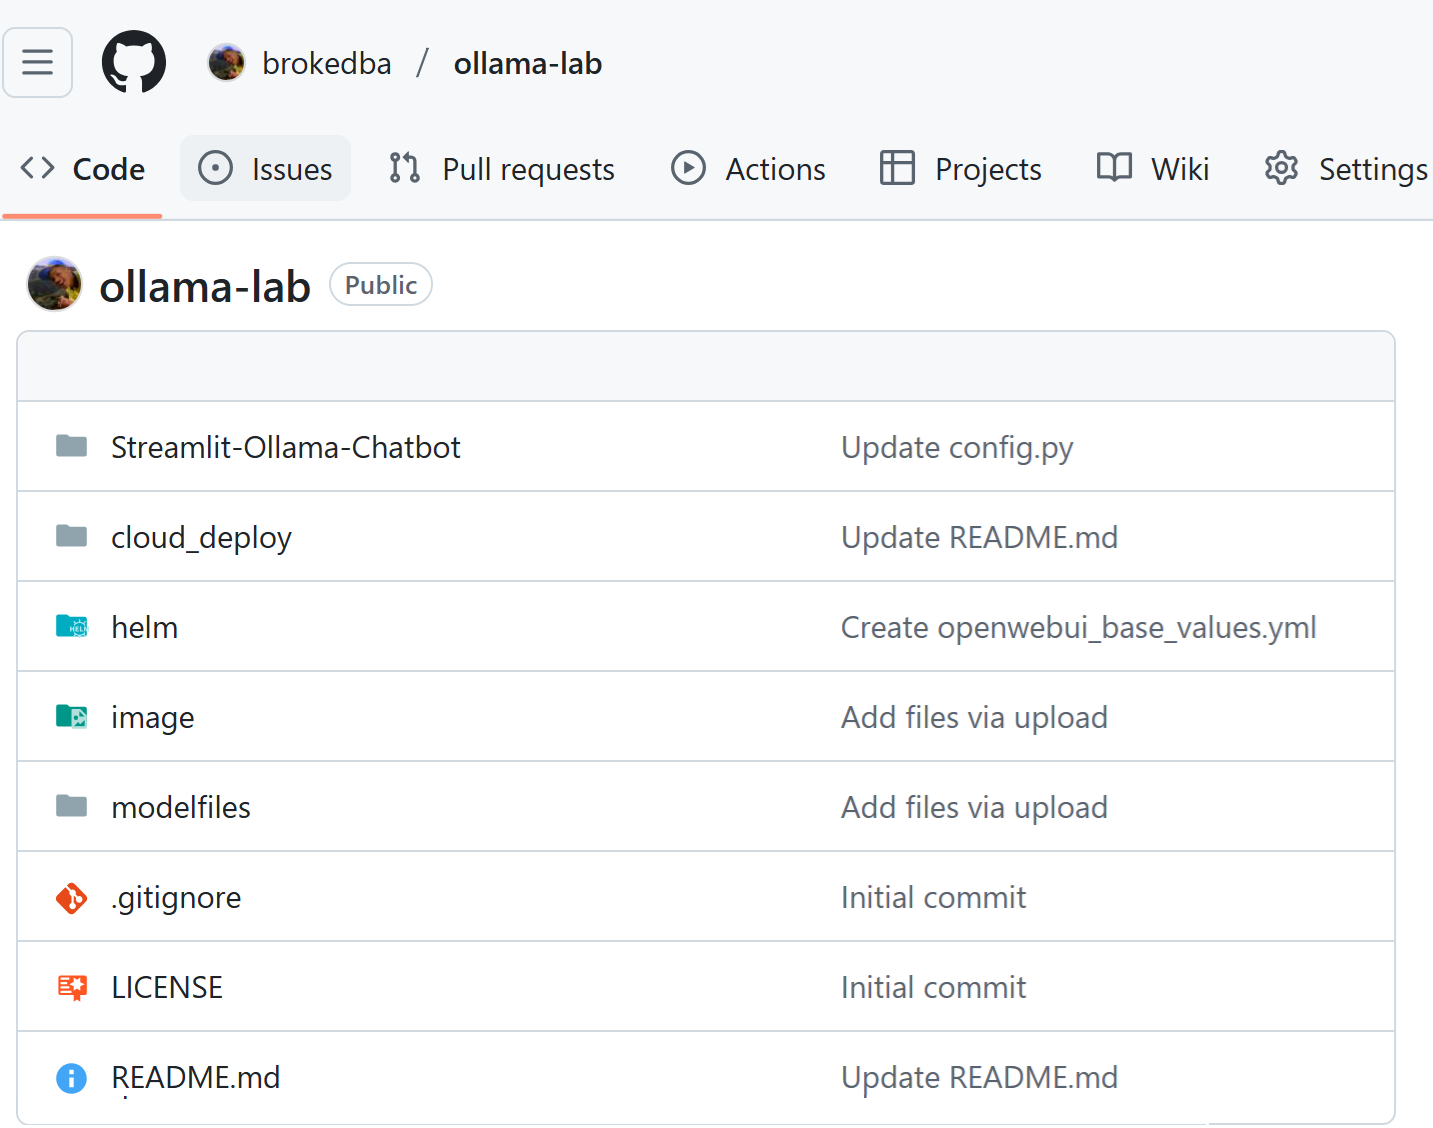
My goal at first was to build a Multi-cloud deployment for Ollama. So I added a cloud_deploy folder to my ollama-lab Git repo. Civo deployment is located under ollama-lab/cloud_deploy/civo directory (see below):
🌍 Repo: https://github.com/brokedba/ollama-lab
🧠This repo is also a one stop shop for all my Ollama learnings 🚀
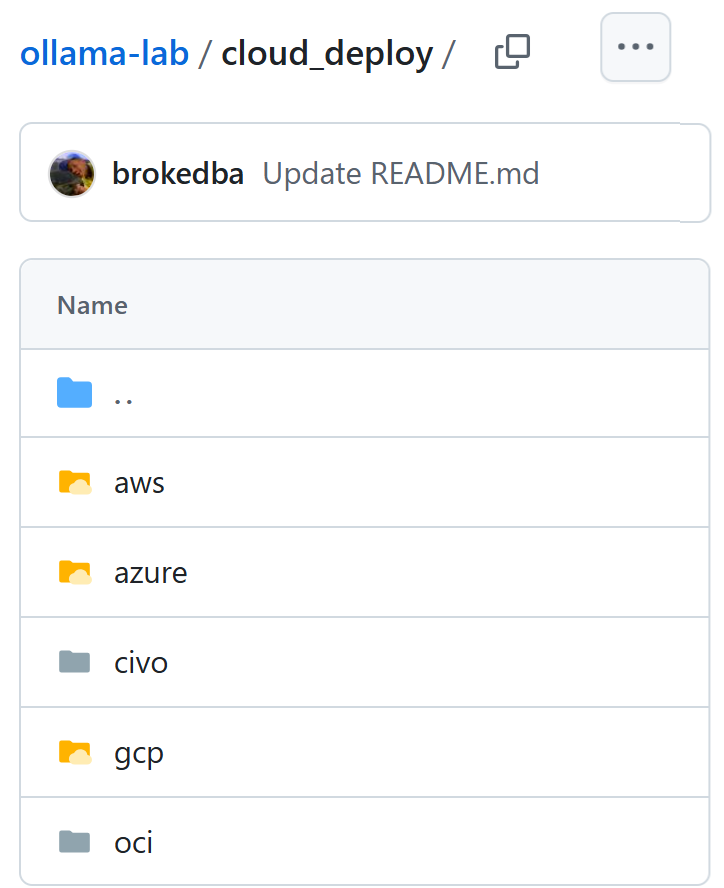
ollama-lab/cloud_deploy/civo- Navigate to the civo directory and initialize terraform
$ git clone https://github.com/brokedba/terraform-examples.git
📂..
$ cd ollama-lab/cloud_deploy/civo
$ terraform init2️⃣ Set Up Environment Variables
use an env-vars file to export your TF_VARS such as Civo API Key. Replace placeholders with your values: :
export CIVO_TOKEN="your-civo-api-key"
export TF_VAR_region="NYC1"
#### [OKTA AUTH] Optional ##################
export TF_VAR_enable_okta="false"    # Default to false
export TF_VAR_okta_client_id="your-okta-client-id"
export TF_VAR_okta_client_secret="your-okta-client-secret"
export TF_VAR_okta_openid_provider="https://your-okta-domain/oauth2/default"- Load the Variables into Your Shell Before running Terraform, source the env-vars file:
$ source env-vars3️⃣ Run Terraform deployment:
Now that the variables are set, you can safely run Terraform plan & apply. You will deploy 14 resources in total, including the download of kubeconfig loacally
$ terraform init
$ terraform plan
$ terraform apply
...
...
...
### Final output
Apply complete! Resources: 14 added, 0 changed, 0 destroyed.
Outputs:
cluster_installed_applications = tolist([])
kubernetes_cluster_endpoint = "https://212.2.111.111:6443"
kubernetes_cluster_id = "d19dd60f-111-111-1111-529c8a1a5299"
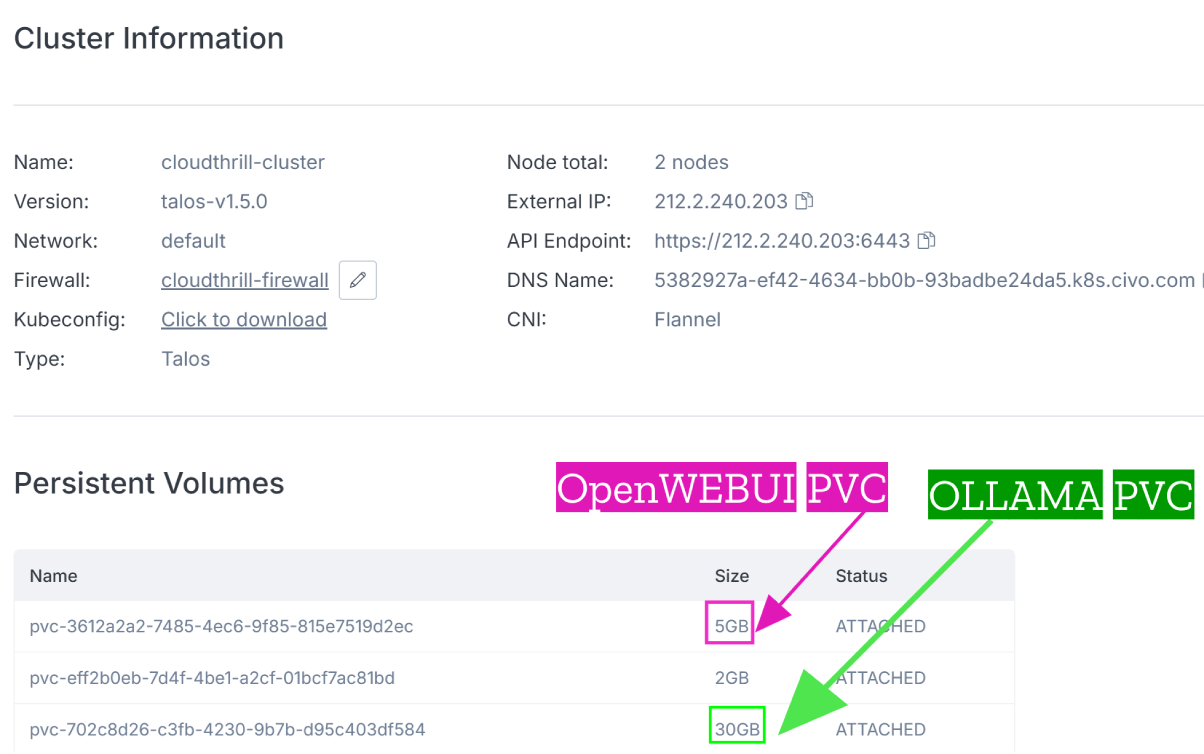
kubernetes_cluster_name = "cloudthrill-cluster"
kubernetes_cluster_ready = true
kubernetes_cluster_status = "ACTIVE"
kubernetes_cluster_version = "talos-v1.5.0"
loadbalancer_dns = {
"hostname" = "https://random-50a0-xssssssx.lb.civo.com" <--- use this link to log in
}
master_ip = "212.2.111.111"
network_id = "33161f60-ed86-4f45-903b-94b7959fc991"
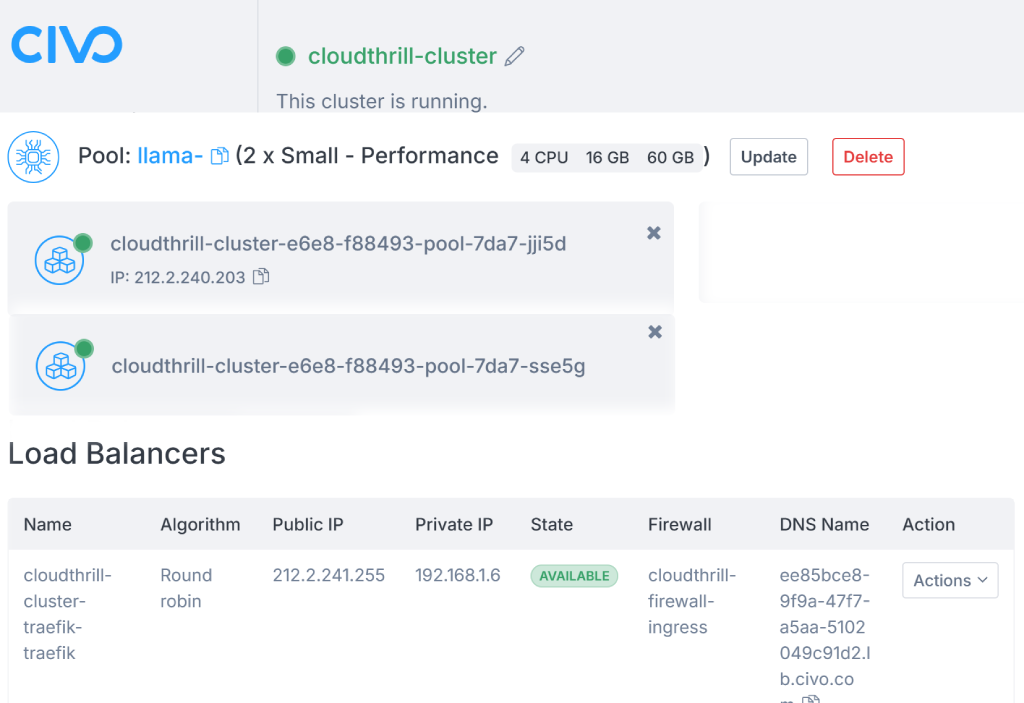
🖥️ Load Balancer Info
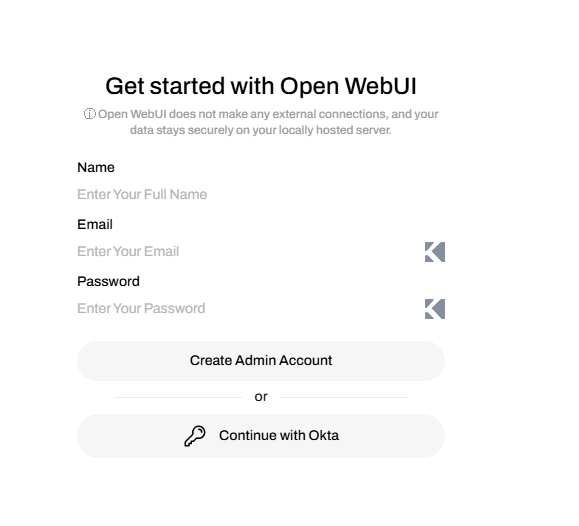
4️⃣Log into OpenWebUI online
Upon deployment, the load balancer’s DNS address will be displayed in the output. Click on the hostname URL to open the OpenWebUI login page (See below).
5️⃣ Destroying the Infrastructure 🚧
To delete everything just run the below (Note: sometimes you need to run it twice as the loadbalancer get’s tough to die)
terraform destroy -auto-approveOkta Authentication use case
This terraform module also offers OKTA Authentication capabilities if you already have an Okta (Developer) Account. However, there is a bit of catch 22 problem here. Follow these steps for the recommended approach:
- ®️Register a Web App in Okta with temporary redirect URIs.
💡Refer to this Guide ➡️: 🔗 Okta OIDC Web App Setup- You can put random values for the redirect URIs we’ll update them later
- Once done, extract the
client_id&client_secretwe’ll need them in our terraform config
- Edit the env-vars below variables
- Set TF_VAR_enable_okta to
TRUEand add the new values forclient_idandsecret_id - Set te
okta_openid_providerbased on the below URL format:
- Set TF_VAR_enable_okta to
export CIVO_TOKEN="your-civo-api-key"
export TF_VAR_region="NYC1"
#### [OKTA AUTH] Optional ##################
export TF_VAR_enable_okta="true"    <------- Enable okta
export TF_VAR_okta_client_id="your-okta-client-id"      <--- update from Okta
export TF_VAR_okta_client_secret="your-okta-client-secret"  <--- update from Okta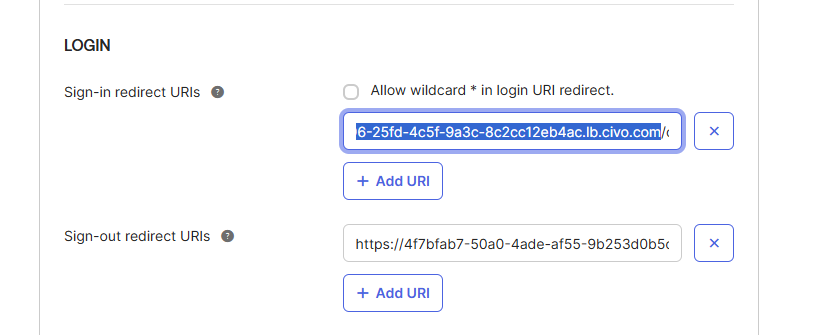
export TF_VAR_okta_openid_provider="https://your-okta-domain/oauth2/default" <--- Okta After the terraform deployment, grab the loadbalancer_dns value, and update Okta Web App settings:
- Sign-in redirect URI →
<loadbalancer_dns>/oauth/oidc/callback - Sign-out redirect URI →
<loadbalancer_dns>
Login into OpenWebUI with okta
- When the first user logs in OpenWebUI (i.e via okta) , he’s granted admin rights by default.
- For non admin users, create a default non-admin group and add the Okta users as they sign up.
- Admin approval for new users is as simple as clicking the pending icon in the first column.

Next Steps 🚀
- Add GPU Acceleration for LLM inference using nvidia drivers plugin.
- Implement Persistent Storage for Models like S3.
- Optimize Autoscaling for Traffic Spikes.
- 🤗Feel free to contribute by sending suggestions& PRs to this Repository.
Conclusion
This project was based on my last talk at Civo navigate San Francisco. It took weeks to bring together Ollama, OpenWebUI, Okta (and more) into a single🔥𝐓𝐞𝐫𝐫𝐚𝐟𝐨𝐫𝐦 stack!🎯—hope you found it useful!. If your organization is exploring private LLM deployments in any cloud, please reach out to Cloudthrill team🤝, we’d love to help.

Run AI Your Way — In Your Cloud
Want full control over your AI backend? The CloudThrill VLLM Private Inference POC is still open — but not forever.
📢 Secure your spot (only a few left), 𝗔𝗽𝗽𝗹𝘆 𝗻𝗼𝘄!
Run AI assistants, RAG, or internal models on an AI backend 𝗽𝗿𝗶𝘃𝗮𝘁𝗲𝗹𝘆 𝗶𝗻 𝘆𝗼𝘂𝗿 𝗰𝗹𝗼𝘂𝗱 –
✅ No external APIs
✅ No vendor lock-in
✅ Total data control
𝗬𝗼𝘂𝗿 𝗶𝗻𝗳𝗿𝗮. 𝗬𝗼𝘂𝗿 𝗺𝗼𝗱𝗲𝗹𝘀. 𝗬𝗼𝘂𝗿 𝗿𝘂𝗹𝗲𝘀…
🙋🏻♀️If you like this content please subscribe to our blog newsletter ❤️.